BLOG UPDATE! These placemats are now available on my Etsy store TheSundayPaperie
Customize with any words you'd like!

I saw this picture on Pinterest, courtesy of the design blog, Cottage and Vine, and fell in love with the simplicity and quirkiness of these placemats. The original poster advises some basic burlap and just using a Sharpie for the lettering. A great afternoon DIY project. I set out to make 6 to use on my kitchen table when it's fully set.
Now, for what the write? Here were a few options:
6 synonyms for 'eat': eat, nourish, chow, bite, dine, devour
6 ways to say 'eat' in various languages: eat (English), φάω (Greek), comer (Spanish), manger (French), essen (German), jeść (Polish)
Or I was thinking to just write out the works one through six.
After a little survey of friends online, the concesus was to write it out in various languages. So here is how it went down:

I wanted each placemat to be 14" x 20", so I purchased 2 yards of burlap fabric at Hobby Lobby. I didn't want anything too scratchy, but something that would fray easily enough to get a little fringe as shown in the photo. I found burlap a shade lighter than the inspiration photo since I have a black table and chairs, and wanted the placemats closer to the color of the chairs' seats I recovered last fall.

Each piece of burlap was cut to the 14" x 20" dimensions, and lightly pulled one thread at a time to create a 1/2" fringe all the way around the placemats.

I didn't want the placemats to 'over-fringe', so I applied a little clear fabric glue to the underside of the placemats to support the existing fringe. I let this dry for a couple of hours.
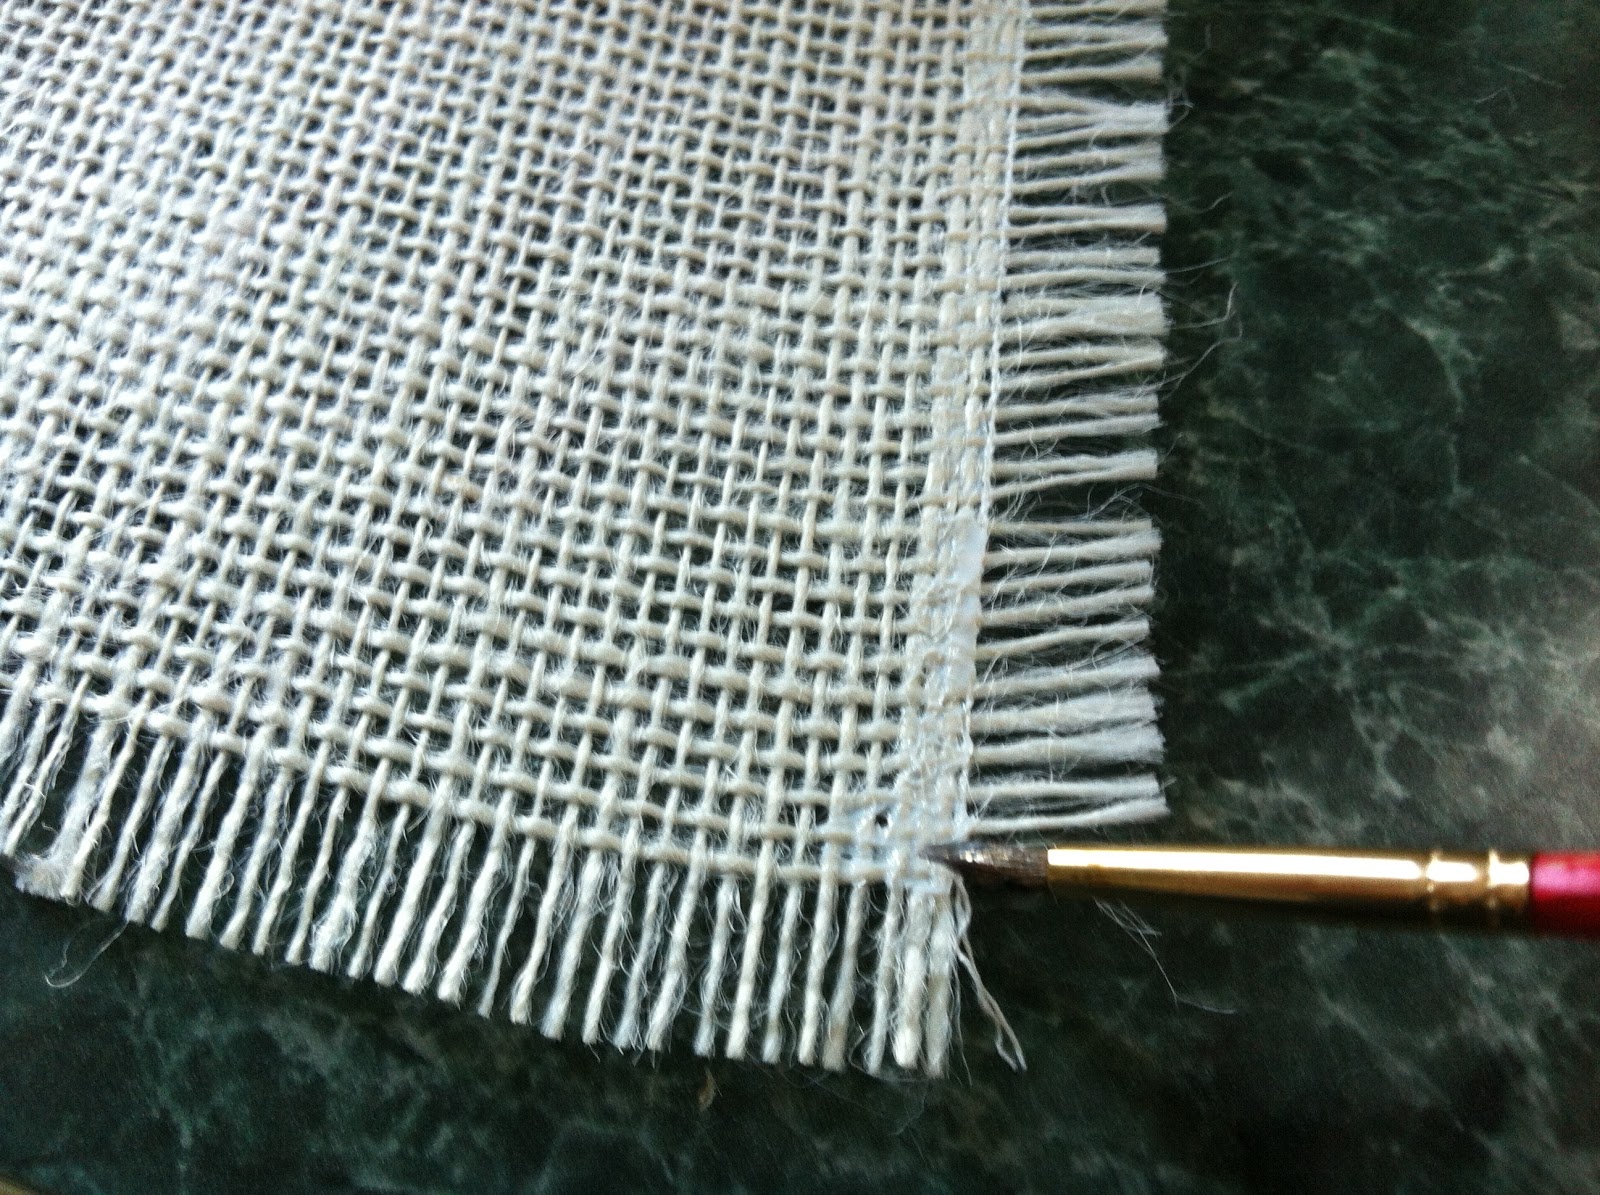
Then I started the lettering by drawing out the letters in pencil in the lower right corner of each placemat. I started with 'eat' (English) and proceeded with the other languages I selected: φάω (Greek), comer (Spanish), manger (French), essen (German), jeść (Polish). Once all of the pencil stencils were in drawn, I used a black Sharpie marker to fill in the pencil.

I would suggest covering your work surface in newspaper or white butcher paper (which is what I used), just in case your marker goes through the fabric (since burlap is pretty porous).

Here is where we had to change gears. I was not happy with how the Sharpie was turning out, so I turned to a small bottle of black acrylic paint and a thin paintbrush to fill in the lettering. I was thrilled with how the paint went on, and continued this through all six placemats. Allow to dry (I left them overnight) and in the morning, you have placemats!

End result: I am so happy of how these turned out! I only have four on the table when I have my kitchen table round, and I put out all six when I have the leaf in (like today). Here how they turned out:


love!!
ReplyDeleteThese are so cute! Would love for you to add these to my Link Up! http://www.pluckys-secondthought.com/mission-monthly-medium-link-up-featuring-burlap-easter-wreath/
ReplyDeleteI have some burlap I "salvaged" from my last vacation where I rescued some trash burlap bags at an oyster factory. I have been looking for a simple how-to for placemats..
ReplyDeletethanks for posting!
Fantastic idea, just wanted to tell you that in Greek "fao" doesn't stand alone
ReplyDeleteYou should write "τρώω"
I love this idea & your tutorial, I have re-pinned it!
ReplyDelete